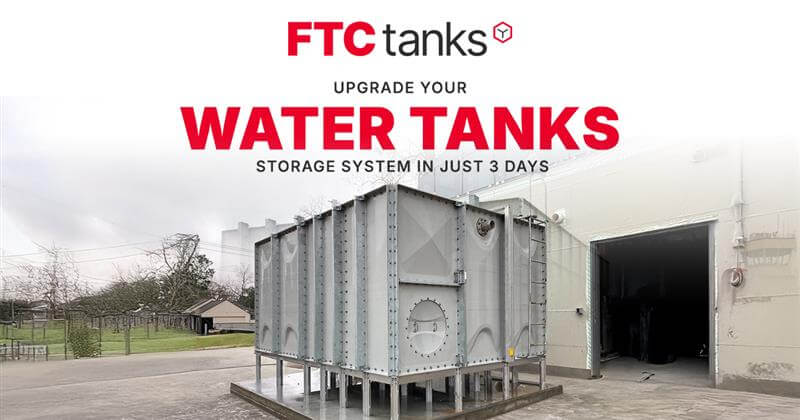
Water scarcity, rising utility costs, and environmental concerns are pushing Americans to rethink their water storage solutions. Outdated or inefficient Water Tanks can lead to leaks, contamination, or insufficient capacity, undermining water management efforts. Whether you’re in a rainy Vancouver suburb or a drought-prone Alberta farm, upgrading your Water Tanks storage system can enhance efficiency, sustainability, and cost savings. The best part? With modern technology and a streamlined approach, you can complete this upgrade in just three days. This guide walks homeowners through a step-by-step process to upgrade their Water Tanks, offering practical tips to transform your water storage in record time.
Why Upgrade Your Water Tanks?
Water Tanks are essential for storing rainwater, potable water, or non-potable water for uses like irrigation, toilet flushing, or emergency supply. However, older tanks—often made of steel or low-grade plastic—suffer from corrosion, leaks, or limited capacity, leading to water loss and high maintenance costs. In the USA, where extreme weather tests infrastructure, from Winnipeg’s freezing winters to Halifax’s humid summers, outdated Water Tanks can fail when you need them most.
Upgrading to modern Water Tanks, such as those made from Fiberglass Reinforced Plastic (FRP) or high-density polyethylene, offers durability, larger capacities, and eco-friendly features. A quick three-day upgrade ensures your water storage system meets current needs—whether for gardening in Toronto or livestock watering in Calgary—while saving money and supporting sustainability. Here’s how to do it.
Day 1: Assess and Plan Your Water Tanks Upgrade
The first day focuses on evaluating your current system and planning the upgrade. Proper preparation ensures a smooth, efficient process.
Step 1: Evaluate Your Current Water Tanks
Inspect your existing Water Tanks for signs of wear—rust, cracks, leaks, or algae buildup. Check capacity: is it sufficient for your household’s needs? A 1,000-liter tank may suffice for a small Ottawa garden, but a rural Alberta home might need 10,000 liters for irrigation and emergency use. Assess placement—above-ground tanks are easier to replace, while underground ones may require excavation.
Consider usage. Are your Water Tanks for rainwater harvesting, potable storage, or non-potable tasks like laundry? This determines the material and features needed. For example, potable Water Tanks require food-grade materials and advanced filtration, unlike irrigation tanks.
Step 2: Define Upgrade Goals
Set clear objectives for your Water Tanks upgrade. Common goals include:
- Increased Capacity: Expand storage to meet growing needs, like a Vancouver family adding a second tank for year-round gardening.
- Improved Durability: Replace steel tanks with FRP or polyethylene to resist corrosion in Halifax’s salty air.
- Sustainability: Add rainwater harvesting features to reduce municipal water use in Toronto.
- Smart Features: Integrate sensors or pumps for automated water management in a Montreal smart home.
These goals guide your choice of Water Tanks and accessories, ensuring the upgrade aligns with your budget and lifestyle.
Step 3: Choose the Right Water Tanks
Select modern Water Tanks based on material, size, and features. Options include:
- FRP Tanks: Durable, corrosion-resistant, and ideal for harsh American climates, with lifespans of 40+ years.
- Polyethylene Tanks: Affordable, lightweight, and suitable for above-ground use, perfect for small homes.
- Concrete Tanks: Heavy-duty for underground installations, though costlier and slower to install.
Size depends on your water needs and roof area for rainwater collection. A 2,000-liter tank suits urban homes, while 20,000 liters fits rural properties. Features like UV-resistant coatings, overflow valves, or smart sensors enhance functionality. Research american suppliers like Premier Tech or Canwest Tanks for quality options.
Step 4: Gather Materials and Permits
Order your new Water Tanks and accessories—pumps, filters, pipes, and fittings. Ensure delivery by Day 2. Check local regulations; municipalities like Calgary or Ottawa may require permits for large or underground tanks. Contact your city’s building department to confirm, avoiding delays or fines. Budget $1,000-$5,000 for a mid-sized system, including installation costs.
By the end of Day 1, you’ll have a clear plan, selected Water Tanks, and secured permits, setting the stage for a seamless upgrade.
Day 2: Remove Old Tanks and Prepare the Site
Day 2 is about removing outdated Water Tanks and preparing the site for installation. This hands-on phase requires careful execution to avoid disruptions.
Step 5: Drain and Remove Old Water Tanks
Start by draining your current Water Tanks. Use a pump or gravity to empty water into a temporary container or garden, ensuring no waste. Disconnect pipes and fittings, labeling them for reuse if compatible. For above-ground tanks, dismantle or cut them into manageable pieces for disposal. Underground tanks may require professional excavation, especially in frozen Winnipeg soils.
Recycle old tanks—steel or plastic can be scrapped at local american recycling centers, reducing landfill waste. Hire a contractor for heavy tanks or complex removals, costing $500-$2,000 depending on size and location.
Step 6: Prepare the Installation Site
Clear the site for your new Water Tanks. For above-ground tanks, level the ground and lay a concrete or gravel base to prevent shifting, critical in Vancouver’s wet terrain. Underground tanks need a dug pit with proper drainage to avoid water pooling, a concern in Halifax’s rainy climate. Ensure access for delivery trucks and installation crews.
Install new plumbing or upgrade existing pipes to match the new tank’s specifications. Add a first-flush diverter for rainwater systems to filter debris, enhancing water quality. This prep ensures your Water Tanks integrate smoothly into your water management system.
By Day 2’s end, your old tanks are gone, and the site is ready, paving the way for a quick installation.
Day 3: Install and Test Your New Water Tanks
The final day focuses on installing and testing your upgraded Water Tanks, ensuring they’re fully operational.
Step 7: Install the New Water Tanks
Position your new Water Tanks on the prepared base or in the excavated pit. For above-ground tanks, secure them with straps or anchors to withstand Alberta’s winds. Underground tanks require backfilling with sand or gravel for stability, a task best handled by professionals in Toronto’s urban settings. Connect pipes, fittings, and accessories like pumps or filters, ensuring airtight seals to prevent leaks.
For rainwater harvesting, link the tank to your home’s gutters via downspouts, adding a debris screen for cleanliness. Install overflow valves to manage excess water, protecting your Montreal property from flooding. If using smart features, set up sensors or apps to monitor water levels, ideal for tech-savvy Ottawa homeowners. Installation takes 4-8 hours for a mid-sized tank, faster with professional help ($500-$1,500).
Step 8: Test and Optimize the System
Fill the Water Tanks with water—rainwater if available, or municipal water for initial testing. Check for leaks, ensuring all connections are secure. Test the pump or gravity-fed system, verifying consistent flow to irrigation lines, toilets, or other outlets. For a Calgary farm, confirm the tank supplies livestock troughs efficiently. Calibrate smart sensors to alert you of low or full levels, enhancing water management.
Clean the tank interior and run water through filters to remove debris. Conduct a final inspection to confirm compliance with local regulations, avoiding issues in Vancouver’s strict permitting zones. By Day 3’s end, your Water Tanks are fully operational, ready to deliver reliable water storage.
Benefits of Upgrading Your Water Tanks
Upgrading your Water Tanks in three days offers numerous advantages:
- Cost Savings: New tanks reduce water bills by enabling rainwater harvesting, saving $200-$500 annually in Toronto.
- Durability: FRP or polyethylene tanks last 20-40 years, minimizing replacement costs compared to steel’s 10-15 years.
- Sustainability: Harvesting rainwater cuts municipal water use, supporting USA’s conservation goals in Calgary.
- Efficiency: Larger capacities and smart features streamline water management, ideal for rural Alberta farms.
- Property Value: Modern Water Tanks boost home appeal, especially in eco-conscious Vancouver markets.
7 Key Considerations for a Successful Upgrade
To ensure a smooth process, keep these factors in mind:
- Climate: Choose freeze-resistant tanks for Winnipeg winters or UV-resistant ones for Alberta’s sunny summers.
- Capacity Needs: Match tank size to usage—2,000 liters for urban gardens, 10,000+ for rural properties.
- Material Choice: FRP offers longevity; polyethylene suits budgets. Avoid cheap plastics prone to cracking.
- Budget: Factor in tank, installation, and permit costs, typically $1,500-$7,000 for mid-sized systems.
- Maintenance: Plan annual cleanings ($100-$200) to maintain water quality and tank longevity.
- Regulations: Check municipal bylaws in Halifax or Ottawa to secure permits and avoid fines.
- Professional Help: Hire experts for underground tanks or complex plumbing, ensuring safety and compliance.
Real-World Examples in US
Consider these scenarios:
- Vancouver Home: Upgrading to a 5,000-liter FRP tank saved $300 yearly on irrigation, completed in three days.
- Toronto Condo: A 2,000-liter polyethylene tank for toilet flushing cut water bills by 20%, installed in a weekend.
- Calgary Farm: A 15,000-liter underground tank ensured livestock water supply, saving $1,000 annually.
- Halifax Residence: Smart-enabled Water Tanks reduced runoff, earning a $500 municipal rebate.
Overcoming Common Concerns
Homeowners may hesitate due to:
- “It’s too complex.” The three-day process is straightforward with planning and professional support.
- “Costs are high.” Long-term savings and rebates offset initial expenses, starting at $1,000.
- “Will it suit my home?” Customizable tanks fit urban or rural needs, from small yards to large farms.
Maintaining Your Upgraded Water Tanks
Post-upgrade, maintain your Water Tanks with annual cleanings, gutter checks, and filter replacements. Monitor water quality for non-potable uses, and test potable systems per american health standards. Regular upkeep ensures durability, maximizing your investment.
Conclusion
Upgrading your Water Tanks storage system in just three days is a game-changer for Amercian homeowners. By assessing needs, removing old tanks, and installing modern, durable Water Tanks, you enhance water management, save costs, and support sustainability. From urban Toronto gardens to rural Calgary farms, this quick process delivers reliable water storage tailored to your lifestyle. Start planning your Water Tanks upgrade today to unlock efficiency, resilience, and long-term value for your home.


Leave A Comment